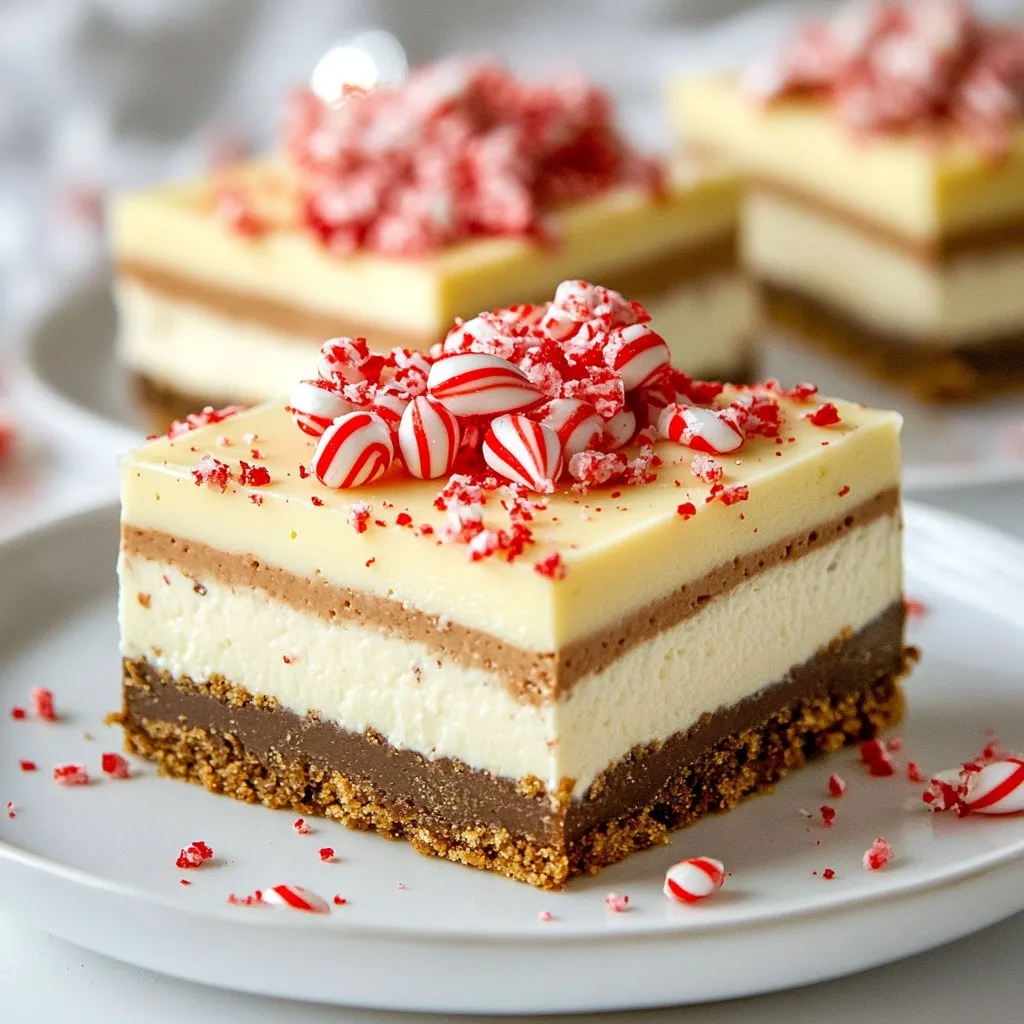
Get ready for the holidays with my Peppermint Mocha Cheesecake Bars! These rich, tasty treats blend creamy cheesecake, coffee, and a touch of peppermint. Perfect for your festive gatherings, they are easy to make and fun to serve. I’ll share everything you need, from ingredients to tips for success. Let’s dive into creating this delicious dessert that will have everyone asking for seconds!
Why I Love This Recipe
- Festive Flavor: This cheesecake bars combine the rich taste of chocolate and coffee with a refreshing peppermint twist, making them perfect for the holiday season.
- Easy to Make: With simple ingredients and straightforward steps, these bars are a breeze to prepare, even for novice bakers.
- Make Ahead Dessert: These bars can be made in advance, allowing you to prepare them a day or two before your holiday gathering.
- Gorgeous Presentation: The crushed peppermint candies on top not only add a pop of color but also enhance the festive look, making them a show-stopper on any dessert table.
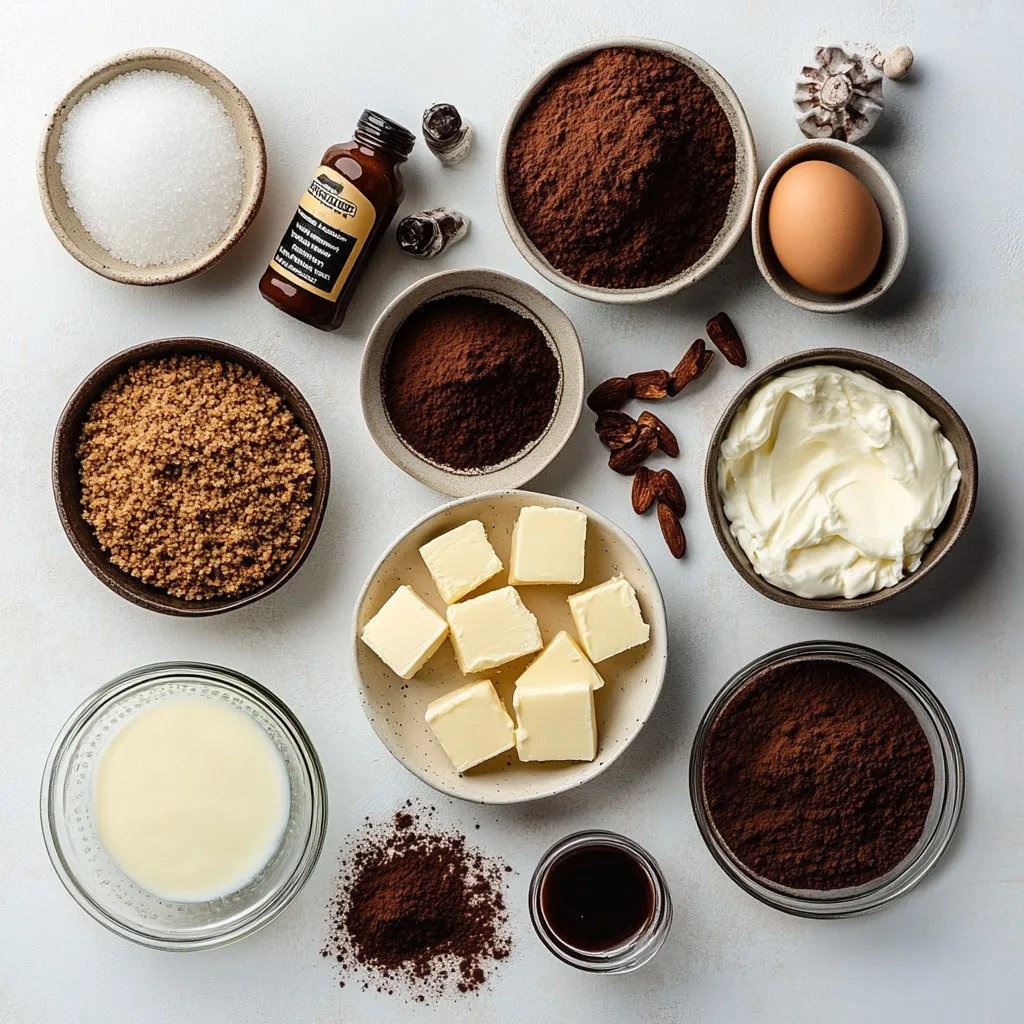
Ingredients
Essential Ingredients for Peppermint Mocha Cheesecake Bars
To make these delicious bars, gather these key ingredients:
– 1 ½ cups graham cracker crumbs
– ½ cup unsalted butter, melted
– 2 tablespoons sugar
– 16 oz cream cheese, softened
– 1 cup granulated sugar
– 1 teaspoon vanilla extract
– 2 large eggs
– ½ cup sour cream
– ½ cup brewed coffee, cooled
– 1 tablespoon cocoa powder
– ½ teaspoon peppermint extract
These ingredients create a rich, creamy filling with a sweet and minty flavor. The graham cracker crust adds a crunchy base that perfectly balances the smooth cheesecake.
Optional Garnishes and Toppings
You can add some fun and festive touches with these garnishes:
– Crushed peppermint candies
– Drizzle of chocolate sauce
These toppings not only make your bars look great but also add extra flavor and a holiday touch. The crushed candies give a nice crunch and a burst of peppermint.
Ingredient Substitutions
If you need to swap ingredients, here are some ideas:
– Use coconut oil instead of butter for a dairy-free option.
– Greek yogurt can replace sour cream for a tangy twist.
– For a caffeine-free version, use decaf coffee.
These substitutions help you customize the recipe while still keeping it tasty. Enjoy making this festive treat!
Step-by-Step Instructions
Preparing the Graham Cracker Crust
Start by preheating your oven to 325°F (165°C). In a bowl, mix 1 ½ cups of graham cracker crumbs, ½ cup of melted unsalted butter, and 2 tablespoons of sugar. Stir well until it looks like wet sand. Press this mixture into the bottom of a greased 9×9 inch baking pan. Make sure it is even and compact. This step creates a solid base for your cheesecake bars.
Making the Cheesecake Filling
In a large mixing bowl, beat 16 oz of softened cream cheese until it is creamy and smooth. Gradually mix in 1 cup of granulated sugar until it is fully combined. Next, add 1 teaspoon of vanilla extract, ½ cup of sour cream, and ½ teaspoon of peppermint extract. Blend in 2 large eggs, one at a time. Mix until each egg is well incorporated before adding the next. Finally, pour in ½ cup of cooled brewed coffee and 1 tablespoon of cocoa powder. Mix until well combined but do not overmix.
Baking and Cooling the Cheesecake Bars
Pour the cheesecake filling over your cooled graham cracker crust, spreading it out evenly. Bake in the preheated oven for 40-45 minutes. The center should be set but still slightly jiggly. Once baked, take the cheesecake bars out and let them cool on a wire rack until they reach room temperature. After cooling, refrigerate for at least 4 hours, or overnight if you can wait. This step is key for the bars to set properly. When ready, cut them into bars and top with crushed peppermint candies for a festive touch.
Tips & Tricks
Achieving the Perfect Texture
To get the best texture for your cheesecake bars, follow these tips:
– Use softened cream cheese. Let it sit at room temp for 30 minutes.
– Mix gently. Overmixing can add air and make your bars crack.
– Bake until slightly jiggly. This means the center is set but still soft.
– Cool slowly. After baking, let the bars cool at room temp first.
Common Mistakes to Avoid
Be aware of these common mistakes:
– Skipping the cooling time. It’s key for the bars to set up properly.
– Not measuring ingredients correctly. Use a kitchen scale for best results.
– Baking at too high a temperature. Stick to 325°F (165°C) for even cooking.
– Using hot coffee. Always let it cool before mixing into the batter.
Best Serving Suggestions
For a festive touch, serve your bars like this:
– Garnish with crushed peppermint candies. It adds a nice crunch and flavor.
– Drizzle chocolate sauce on top. This creates a rich, elegant look.
– Serve chilled. It makes the flavors pop and feels refreshing.
– Pair with whipped cream. A dollop adds creaminess and balances the taste.
Pro Tips
- Chill Your Ingredients: Make sure your cream cheese and sour cream are at room temperature before mixing. This helps to achieve a smoother filling without lumps.
- Use Quality Cocoa Powder: Opt for a high-quality cocoa powder for the best flavor. The richness of the cocoa will significantly enhance your cheesecake bars.
- Don’t Overmix: When incorporating the coffee and cocoa, mix just until combined. Overmixing can lead to cracks in your cheesecake as it bakes.
- Rest Before Cutting: Allow the cheesecake to fully chill in the refrigerator, preferably overnight. This will make it easier to cut into clean, even bars.
Variations
Alternate Flavor Profiles
You can change the flavor of your cheesecake bars in fun ways. Instead of peppermint, try using orange zest for a bright twist. You could also swap the cocoa powder for melted chocolate for a rich touch. For a festive vibe, use ginger or cinnamon for a holiday spice. Each variation brings its own magic!
Gluten-Free Adaptation
If you need a gluten-free option, use gluten-free graham crackers for the crust. Just crush them as you would regular ones. Ensure all your other ingredients, like the baking powder and chocolate, are gluten-free too. This way, everyone can enjoy these rich bars without worry.
Vegan-Friendly Option
For a vegan version, replace the cream cheese with a plant-based alternative. Use silken tofu blended until smooth or a dairy-free cream cheese. Instead of eggs, you can use flaxseed meal mixed with water as a binder. This gives the bars the perfect texture while keeping them vegan-friendly. You won’t miss the dairy!
Storage Info
Best Practices for Storage
To keep your peppermint mocha cheesecake bars fresh, store them in the fridge. Place them in an airtight container. This helps keep the bars moist and flavorful. If you use a plate, cover it tightly with plastic wrap. Avoid letting them sit out at room temperature for long. This can cause them to lose their creamy texture and taste.
How Long Do They Last?
These cheesecake bars can last up to five days in the fridge. After that, they may lose their flavor and texture. If you notice any changes in smell or look, it is best to toss them out. Always check for freshness before enjoying your treat!
Freezing For Later Use
You can freeze these cheesecake bars if you want to save some for later. Cut them into individual bars before freezing. Wrap each bar tightly in plastic wrap, then place them in a freezer-safe bag. They can last for about three months in the freezer. To enjoy, just thaw them in the fridge overnight. Avoid refreezing them to keep the best taste and texture.
FAQs
Can I use a different type of crust?
Yes, you can! While I love the graham cracker crust, you can try other options. A chocolate cookie crust adds a rich flavor. You could also use an Oreo crust for a fun twist. Just follow the same steps for pressing the crust into the pan. Make sure it’s even and firm.
How do I know when the cheesecake bars are done?
Check the center of the bars. They should be set but still have a slight jiggle. This means they will firm up as they cool. If the edges look firm and the middle jiggles a bit, they are ready. Don’t overbake them, or they will crack.
Can I make these in advance?
Absolutely! These cheesecake bars are great for making ahead. You can bake them one to two days before your event. Just let them cool and then chill them in the fridge. This helps the flavors blend nicely. When you’re ready to serve, just cut them up and add the crushed peppermint on top.
You’ve learned how to make delicious peppermint mocha cheesecake bars. We covered essential ingredients, step-by-step instructions, and helpful tips. We also discussed tasty variations and storage ideas. Follow these guides to ensure your bars turn out perfectly every time. Enjoy creating sweet treats that please every palate. With practice and patience, you’ll master this dessert and impress your friends and famil