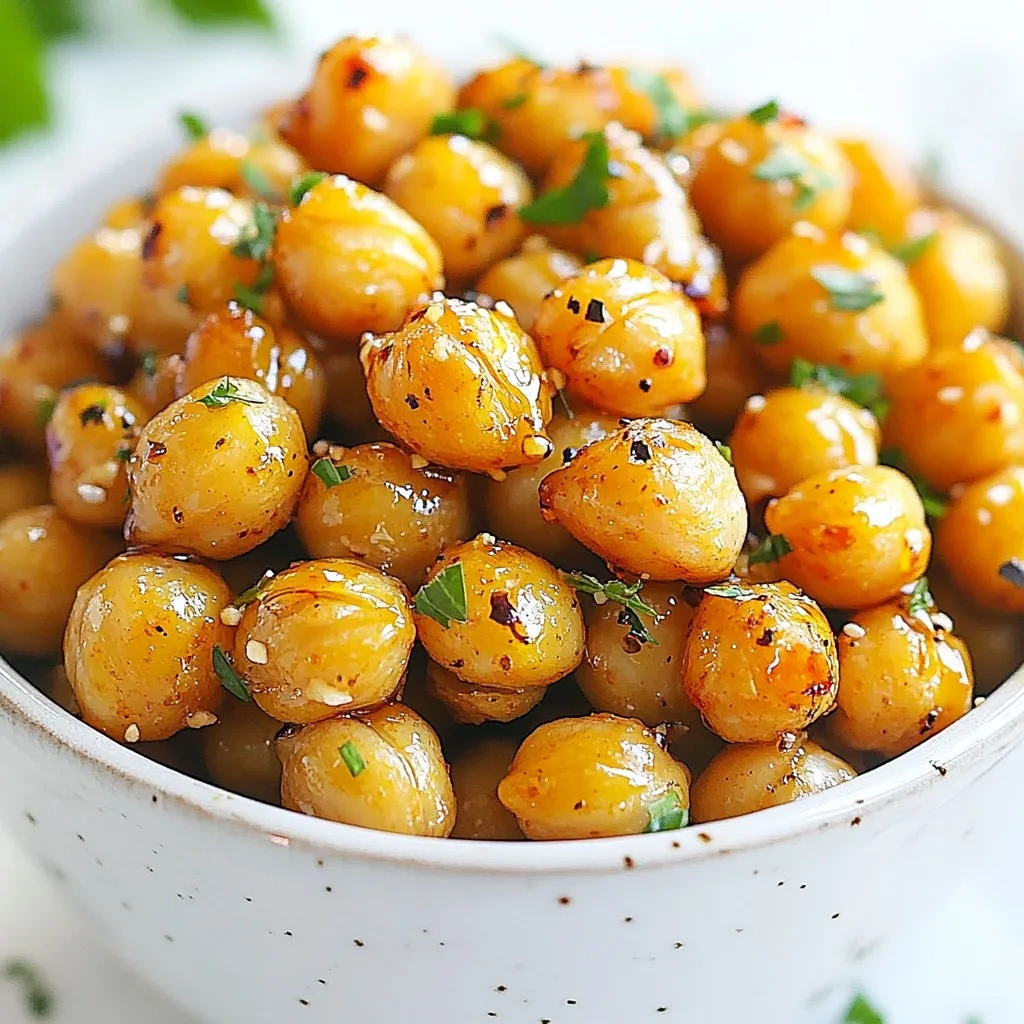
Looking for a snack that’s both easy to make and full of flavor? Honey Garlic Roasted Chickpeas are your answer! With a crispy crunch and a sweet, savory glaze, these morsels are perfect for any time of day. I’ll guide you through simple steps, share ingredient tips, and even suggest fun variations. Let’s dive into this tasty treat that will impress your taste buds and keep you coming back for more!
Why I Love This Recipe
- Healthy Snack Option: Roasted chickpeas are packed with protein and fiber, making them a nutritious alternative to chips.
- Quick and Easy: This recipe takes minimal prep time, and you can have a delicious snack ready in under 40 minutes.
- Customizable Flavor: You can adjust the spices and heat level to suit your taste, making every batch unique.
- Perfect for Entertaining: Serve them in a stylish bowl with a dipping sauce for a great appetizer at gatherings.
Ingredients
List of Ingredients
To make Honey Garlic Roasted Chickpeas, you will need the following:
– 1 can (15 oz) chickpeas, rinsed and drained
– 2 tablespoons olive oil
– 3 tablespoons honey
– 3 cloves garlic, minced
– 1 teaspoon smoked paprika
– 1/2 teaspoon salt
– 1/4 teaspoon black pepper
– 1/4 teaspoon cayenne pepper (optional for heat)
– Fresh parsley, chopped (for garnish)
Measuring Tips
When measuring, use a standard measuring spoon for accuracy. Make sure to rinse the chickpeas well to remove any canning liquid. For honey, use a liquid measuring cup for a clean pour. If you don’t have a measuring spoon, a tablespoon from your kitchen can work just fine. Just remember that 1 tablespoon equals 3 teaspoons.
Ingredient Substitutions
If you need to swap ingredients, here are some ideas:
– Use maple syrup instead of honey for a vegan option.
– Avocado oil can replace olive oil for a different flavor.
– If you don’t have smoked paprika, regular paprika works too.
– For garlic, garlic powder can stand in, but fresh is best.
– If you want more heat, add a pinch of chili powder instead of cayenne.
These tips help you make this snack your own while keeping it tasty.

Step-by-Step Instructions
Preparation Overview
To make honey garlic roasted chickpeas, start by gathering your ingredients. You need one can of chickpeas, olive oil, honey, garlic, and spices. Rinsing and draining the chickpeas is key for crispness. This step removes excess liquid, allowing the chickpeas to roast perfectly.
Detailed Cooking Process
1. First, preheat your oven to 400°F (200°C). Line a baking sheet with parchment paper. This makes cleanup easy.
2. In a bowl, mix the drained chickpeas with two tablespoons of olive oil. Add three tablespoons of honey and three minced garlic cloves.
3. Now, sprinkle in one teaspoon of smoked paprika, half a teaspoon of salt, and a quarter teaspoon of black pepper. If you like heat, add a quarter teaspoon of cayenne pepper.
4. Toss everything together until the chickpeas are coated well. This mix gives them amazing flavor.
5. Spread the chickpeas on the lined baking sheet in a single layer. This helps them cook evenly.
6. Roast them in the oven for 25 to 30 minutes. Stir them halfway through to ensure they brown nicely.
7. Once they are golden brown and crispy, take them out. Let them cool for a few minutes. They will get even crispier as they cool.
8. Finally, transfer the chickpeas to a bowl and garnish with chopped parsley. This adds color and freshness.
Tips for Perfect Roasting
– Make sure your chickpeas are dry before mixing. This step helps with crispness.
– Stirring halfway through roasting is important. It helps them cook evenly.
– If you prefer extra crunch, roast them a few minutes longer. Just keep an eye on them!
– For serving, a stylish bowl makes a great presentation. You can also add a dipping sauce like yogurt or hummus. This adds extra flavor and fun.
Time and Serving Information
Prep Time
The prep time for honey garlic roasted chickpeas is just 10 minutes. This quick step includes rinsing and draining the chickpeas and mixing them with the other ingredients.
Cook Time
Once prepped, you will roast the chickpeas in the oven. This takes about 25 to 30 minutes. They will turn golden and crispy, perfect for snacking.
Serving Suggestion
This recipe makes four servings. You can enjoy the chickpeas straight from the bowl. They pair well with yogurt or hummus for dipping. For a nice touch, add a sprinkle of fresh parsley on top for color.
Pro Tips
- Use Dried Chickpeas: For an even more flavorful and crispy result, try using dried chickpeas that you soak and cook yourself instead of canned ones.
- Adjust Sweetness: Depending on your taste preference, feel free to adjust the amount of honey. You can use maple syrup for a vegan alternative.
- Spice Variations: Experiment with different spices like cumin, curry powder, or garlic powder to customize the flavor profile of your roasted chickpeas.
- Storage Tips: Store any leftover roasted chickpeas in an airtight container at room temperature for up to a week to maintain their crunchiness.
Tips & Tricks
How to Customize Flavor
You can change the flavor of your honey garlic roasted chickpeas. Here are a few ideas:
– Add herbs: Mix in rosemary or thyme for a fresh taste.
– Try different sweeteners: Use maple syrup or agave instead of honey.
– Experiment with spices: Try cumin or curry powder for a bold kick.
– Add a squeeze of lemon: It brightens the flavors and adds zest.
These easy swaps let you make the recipe fit your taste.
Storage and Reheating Tips
To keep your roasted chickpeas fresh, store them in an airtight container. Here’s how:
– Room temperature: They last for up to three days.
– Refrigerate: If you need to keep them longer, store them in the fridge for up to a week.
– Reheat: To regain crispiness, place them in the oven for a few minutes.
Avoid microwaving, as it may make them soggy.
Common Mistakes to Avoid
Watch out for these common mistakes when making honey garlic roasted chickpeas:
– Not drying chickpeas: Always dry them well after rinsing. Wet chickpeas won’t crisp up.
– Overcrowding the pan: Spread them out in a single layer for even roasting.
– Skipping stirring: Stir halfway through cooking for even browning.
– Not checking doneness: Every oven is different. Keep an eye on them for best results.
Avoiding these pitfalls helps ensure a tasty snack every time!
Variations
Spicy Honey Garlic Chickpeas
To add some heat, try spicy honey garlic chickpeas. Start by mixing in cayenne pepper. You can also use chili powder for a different flavor. Just add a pinch or more to your bowl. The heat will pair well with the sweet honey. This gives you a nice kick with every bite. You can adjust the spice to fit your taste. Serve these spicy chickpeas as a fun snack or appetizer.
Herb-Infused Options
For a fresh twist, consider herb-infused options. You can add dried herbs like thyme or rosemary to the mix. These herbs add a nice aroma and flavor to the chickpeas. Fresh herbs like basil or cilantro can also work well. Just chop them finely and mix them in before roasting. This variation gives your dish a garden-fresh taste that everyone will love.
Vegan Alternatives
If you want a vegan twist, you can replace honey. Use maple syrup or agave nectar instead. Both will give you that sweet flavor without using honey. The process stays the same, and you still get crispy chickpeas. This option keeps the recipe plant-based while still being tasty. You won’t miss the honey at all!
FAQs
Can I use dried chickpeas instead of canned?
Yes, you can use dried chickpeas. However, you need to cook them first. Soak them overnight and then boil until tender. This process takes longer than using canned chickpeas. Canned chickpeas save time and are ready to use right away.
How do I store leftover roasted chickpeas?
To store leftover roasted chickpeas, let them cool completely. Place them in an airtight container. They will stay fresh for up to three days. For longer storage, keep them in the fridge. You can also freeze them, but their crispness may change.
What can I pair with Honey Garlic Roasted Chickpeas?
Honey garlic roasted chickpeas are great on their own. You can serve them with yogurt or hummus for dipping. Add them to salads for extra crunch. They also work well as a topping on soups or grain bowls. Try mixing them with nuts for a fun snack mix!
This blog post covered ingredients, cooking steps, and helpful tips for roasted chickpeas. You learned how to measure ingredients, substitute when needed, and perfect your cooking process. Remember to customize your flavors and avoid common mistakes. With these skills, you can create tasty variations like spicy or herb-infused chickpeas. Store leftovers properly for a quick snack. Enjoy these dishes that are fun to make and great to share. Dive in and have fun cookin