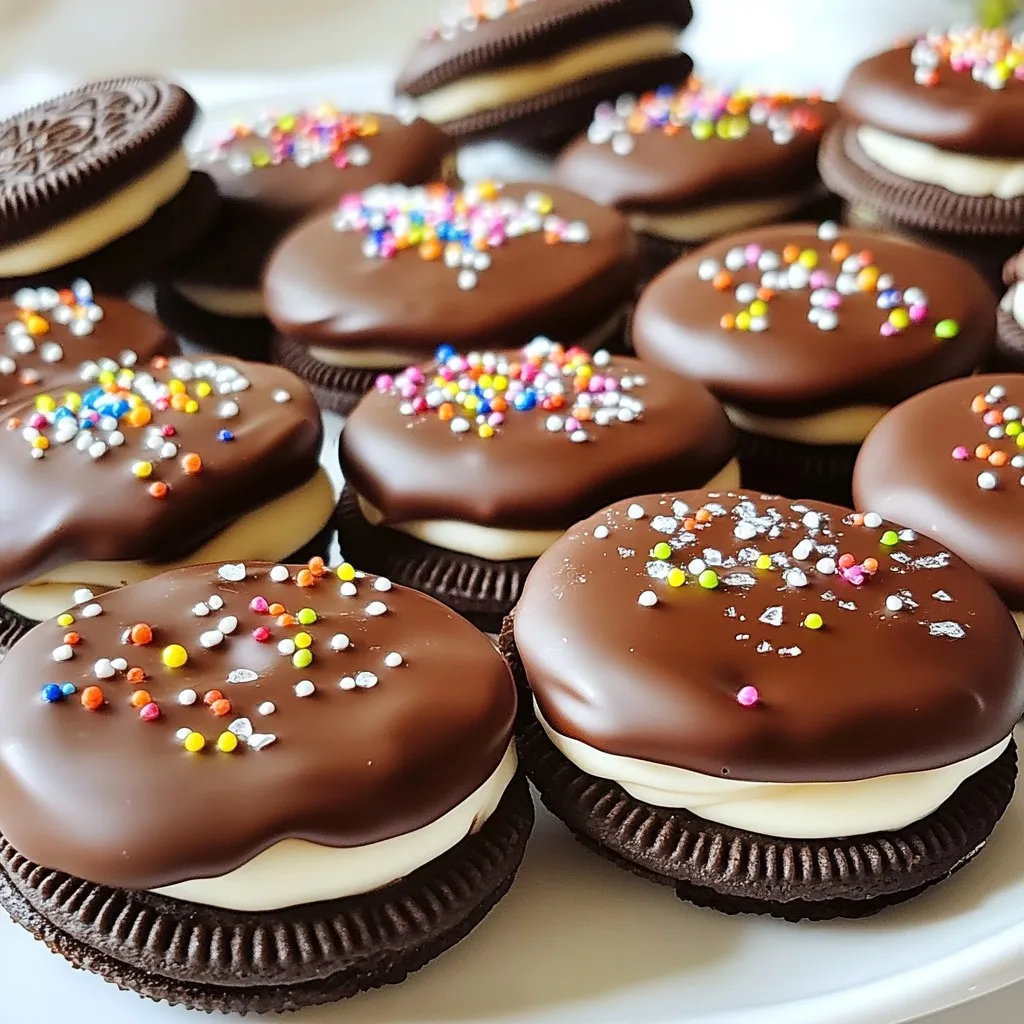
Indulging in Chocolate Covered Oreos is a simple way to treat yourself! These sweet snacks are easy to make and taste amazing. I’ll guide you through each step, from gathering just a few ingredients to dipping those Oreos in rich chocolate. Whether you’re a beginner or an expert, you’ll love these tips and tricks. Ready to impress your friends and family with this delightful treat? Let’s get started!
Why I Love This Recipe
- Quick and Easy: This recipe requires minimal ingredients and can be prepared in just 30 minutes, making it perfect for last-minute treats.
- Customizable: You can easily adjust the toppings to suit any occasion, whether you prefer sprinkles for a party or sea salt for a gourmet touch.
- Decadent Flavor: The combination of rich chocolate and the classic Oreo cookie creates an irresistible sweet treat that everyone loves.
- Fun to Make: Dipping the Oreos in chocolate is a fun activity that can involve the whole family, making it a great choice for a group cooking session.
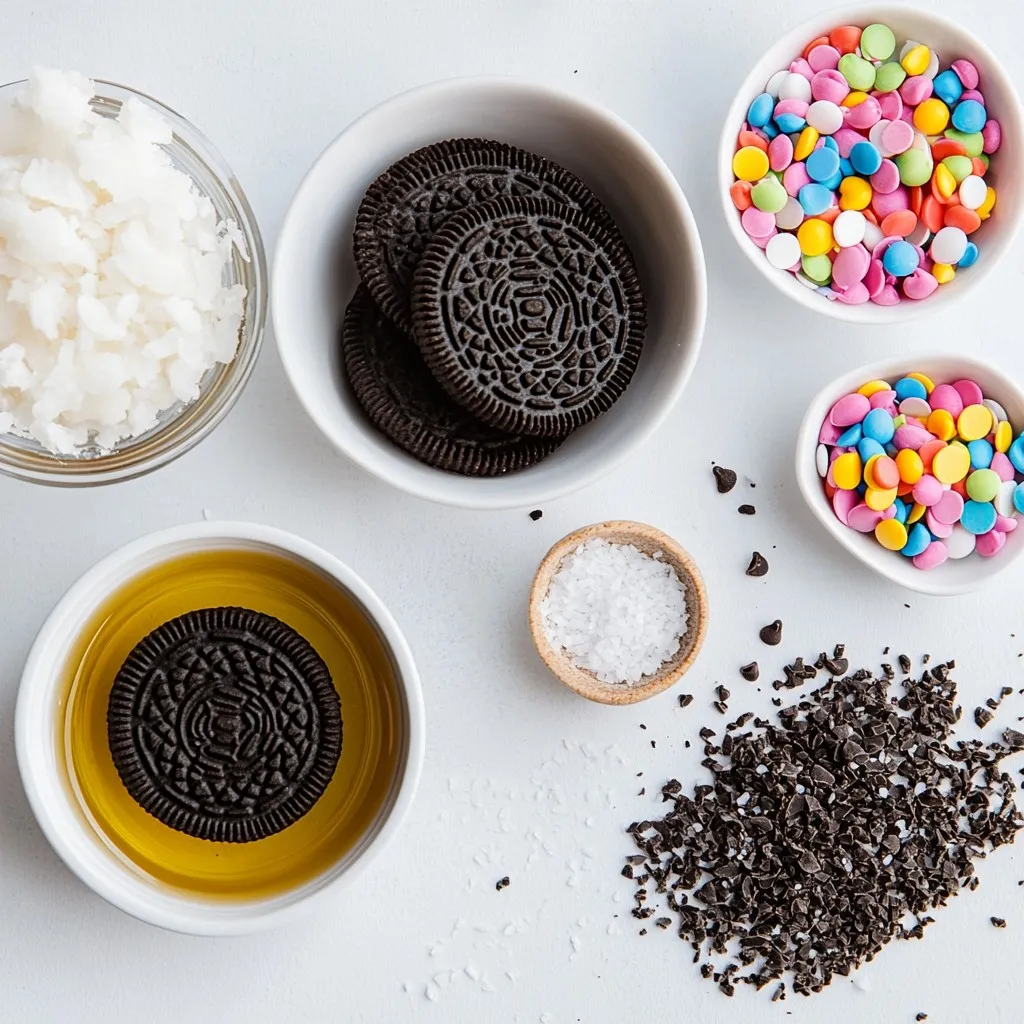
Ingredients
To make chocolate-covered Oreos, gather these simple ingredients:
– Oreo cookies
– Semi-sweet chocolate chips
– Coconut oil (optional)
– Colorful sprinkles (optional)
– Sea salt flakes (optional)
These ingredients create a sweet treat that’s easy to prepare. The main star is the Oreo cookie. You can find them in any store. The semi-sweet chocolate chips bring that rich flavor. You can use coconut oil to make the chocolate smoother.
Sprinkles add fun colors, while sea salt gives a nice contrast. This mix of flavors and textures makes each bite special. Choose the optional items based on your taste. You can keep it simple or make it festive.
Now that you have your ingredients, you’re ready to start dipping!
Step-by-Step Instructions
Preparing Your Workstation
First, gather all your ingredients. You need Oreo cookies, chocolate chips, and any toppings. Next, line a baking sheet with parchment paper. This keeps the Oreos from sticking and helps with cleanup. Make sure you have a fork ready for dipping.
Melting the Chocolate
Use a microwave-safe bowl for the chocolate. Add the chocolate chips and coconut oil if you want a smoother coating. Heat in the microwave for 30 seconds at a time. Stir between each heating. Keep going until the chocolate is smooth and melted. This should take about 1 to 2 minutes.
Dipping the Oreos
Hold one Oreo by the edge. Dip it into the melted chocolate. Make sure it is fully coated. Use a fork to help lift it out. Allow extra chocolate to drip back into the bowl. Place the Oreo on the lined baking sheet.
Adding Optional Toppings
While the chocolate is still wet, add your toppings. You can sprinkle colorful sprinkles for fun. Or, you can use sea salt for a sweet and salty treat. Be creative with your choices!
Setting the Chocolate
Once all Oreos are dipped, it’s time to set them. Place the baking sheet in the refrigerator. Let the Oreos chill for about 15 to 20 minutes. This will help the chocolate harden. Once set, they are ready to eat!
Tips & Tricks
How to Achieve a Smooth Chocolate Coating
To get a smooth chocolate coating, start with good chocolate. Use semi-sweet chocolate chips. They melt easily and taste great. Adding one tablespoon of coconut oil helps too. It makes the chocolate shiny and smooth. When melting, use a microwave. Heat in 30-second bursts. Stir after each burst until melted. This way, you prevent burning the chocolate. A smooth coating makes your Oreos look nice.
Best Practices for Decorating Oreos
When the chocolate is still wet, add sprinkles. This is the best time for fun colors. Hold the Oreo by one side while dipping. Let the excess chocolate drip off. Then, place it on parchment paper. If you want a fancy look, try sea salt. A pinch on top gives a sweet and salty taste. Be creative with your designs. Mix and match toppings for fun!
Alternative Melting Methods
You can melt chocolate in more ways than one. A double boiler works well too. Place a heatproof bowl over simmering water. This method gives you more control. Stir the chocolate often for even melting. If you don’t have a microwave or double boiler, you can use a slow cooker. Set it on low heat and stir often. This method is slower, but it works great for larger batches.
Pro Tips
- Use High-Quality Chocolate: For the best flavor and texture, opt for high-quality semi-sweet chocolate. It will melt more smoothly and taste richer.
- Chill Before Dipping: If your Oreos are too soft, chill them in the refrigerator for about 10 minutes before dipping. This will help them maintain their shape.
- Experiment with Flavors: Try using different types of chocolate, such as milk or white chocolate, for a unique twist. You can also add flavor extracts to the chocolate for added depth.
- Store Properly: To keep your chocolate dipped Oreos fresh, store them in an airtight container. They can be kept at room temperature for up to a week or in the fridge for longer freshness.
Variations
Different Types of Chocolate Coatings
You can use many types of chocolate for your Oreos. Each type gives a new taste. Here are some popular choices:
– Milk chocolate: Sweet and creamy. It’s a classic favorite.
– Dark chocolate: Rich and slightly bitter. It pairs well with the sweet Oreo.
– White chocolate: Creamy and smooth. It adds a fun twist.
– Flavored chocolate: Try mint or orange for a unique taste.
You can mix and match these chocolates too. For example, dip half in milk and half in dark.
Unique Topping Ideas (Sprinkles, Nuts, etc.)
The fun doesn’t stop at chocolate. You can add toppings for extra flair. Here are some ideas:
– Colorful sprinkles: Perfect for parties and kids. They add a pop of color.
– Chopped nuts: Almonds or peanuts give a nice crunch.
– Coconut flakes: They add a tropical vibe.
– Crushed cookies: Use other cookies for a fun texture.
Add these toppings while the chocolate is still wet. This way, they stick well.
Flavor Infusions for Chocolate and Oreos
You can make your chocolate even more exciting with flavors. Here are some fun ideas:
– Mint extract: Add a few drops to your melted chocolate. It gives a fresh taste.
– Vanilla extract: This adds a warm flavor that complements the Oreo.
– Espresso powder: A tiny bit can enhance the chocolate’s richness.
These infusions are easy to do. Just mix them in as you melt your chocolate. Enjoy creating your unique chocolate-covered Oreos!
Storage Info
How to Store Chocolate Covered Oreos
Store your chocolate-covered Oreos in an airtight container. This helps keep them fresh. You can place them at room temperature or in the fridge. If it’s warm, the fridge is best.
Best Practices for Keeping Them Fresh
To keep your Oreos crisp, separate layers with parchment paper. This prevents them from sticking together. Avoid placing them near strong odors, as they can absorb them. Check them every few days to ensure they stay fresh.
Shelf Life of Homemade vs. Store-bought
Homemade chocolate-covered Oreos last about one week. Store-bought ones can last longer, often up to two weeks. Always check the packaging for specific dates. If you see any changes in texture or smell, it’s best to discard them.
FAQs
How long do chocolate-covered Oreos last?
Chocolate-covered Oreos last about 1 to 2 weeks. Store them in an airtight container. They stay fresh at room temperature or in the fridge.
Can I freeze chocolate-covered Oreos?
Yes, you can freeze chocolate-covered Oreos. Place them in a single layer in an airtight container. They can last for up to 3 months in the freezer. Just thaw them before serving.
Are there any gluten-free options for Oreos?
Yes, there are gluten-free Oreos available. Look for brands that specifically label their cookies as gluten-free. This way, you can enjoy the treat without worry.
Where can I buy pre-made chocolate-covered Oreos?
Pre-made chocolate-covered Oreos can be found at many grocery stores. Check the snack aisle or the bakery section. You can also find them online at various retailers.
What is the best chocolate to use for dipping Oreos?
The best chocolate for dipping Oreos is semi-sweet chocolate. It melts well and balances sweetness. You can also use milk chocolate or dark chocolate, depending on your taste.
You learned how to make delicious chocolate-covered Oreos with simple steps. We discussed key ingredients like Oreo cookies and chocolate, along with optional toppings for extra fun. Remember to store them correctly to keep them fresh. Experiment with different chocolates and toppings to find your favorite mix. Enjoy the sweet results of your hard wor